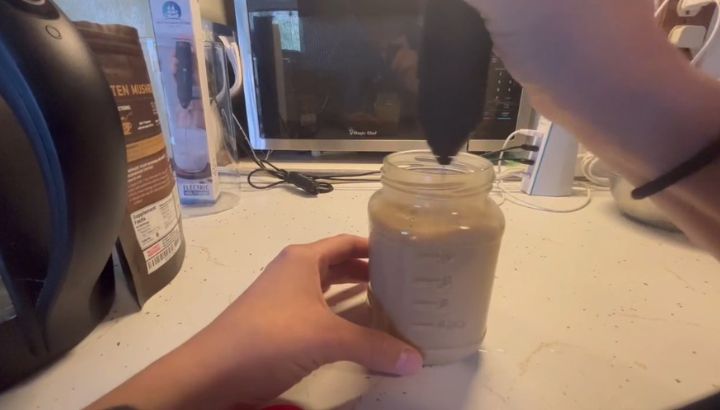
To make homemade coffee creamer, combine 1 cup of heavy cream or whole milk with 1 cup of sweetened condensed milk and 1 to 2 teaspoons of your chosen flavoring extract in a sealed glass jar, shake or whisk until fully combined, and refrigerate for up to two weeks.
The sweetened condensed milk provides both sweetness and a thick, syrupy body that commercial creamers achieve through additives like carrageenan and dipotassium phosphate. No cooking is required for the basic version, and the entire process takes under five minutes.
For flavored variations including vanilla, hazelnut, caramel, and pumpkin spice, add extracts, syrups, or spice blends directly to the base mixture before refrigerating. The ratio of heavy cream to condensed milk determines richness, while the flavoring quantity determines intensity.
If you’ve been buying commercial liquid creamers and wondering what’s actually in them, the ingredient label answers that question quickly: hydrogenated oils, artificial flavors, thickeners, preservatives, and sugar in quantities that most people would never add knowingly. The frustrating part is that homemade versions taste noticeably better, cost less per serving, and take less time to make than a trip to the grocery store.
The biggest barrier most people face is not knowing the base formula and how to adjust it. Once you understand what sweetened condensed milk does to the texture, how to balance fat content for richness, and which flavoring approaches produce the most stable results, making your own creamer becomes as automatic as any other weekly kitchen task.
This guide covers every base recipe, every flavoring variation, the equipment that makes the process faster, and the specific mistakes that cause homemade creamer to separate, curdle, or lose flavor within the first few days of refrigeration.
How Homemade Coffee Creamer Works
The Role of Sweetened Condensed Milk
Sweetened condensed milk is the functional core of most homemade coffee creamer recipes. It’s made by evaporating approximately 60% of the water from whole milk and adding sugar until the mixture is thick, stable, and intensely sweet. The resulting product has a sugar content of approximately 55% by weight and a fat content of 8% to 9%, which is significantly higher than regular whole milk.
This combination of reduced water content, high sugar concentration, and moderate fat produces the thick, pourable body that creamers need. The sugar also acts as a mild preservative by reducing water activity in the mixture, which extends shelf life compared to plain milk or cream alone.
One standard 14 oz (397g) can of sweetened condensed milk from brands including Eagle Brand, Carnation, or store-brand equivalents provides enough base sweetening and body for a full batch of 16 to 24 oz of finished creamer, depending on how much dairy you add.
The Fat Component and Its Function
The fat source you add to the condensed milk determines the creaminess, mouthfeel, and how smoothly the creamer integrates into hot coffee without curdling. Different fat sources produce different results across these three dimensions.
Heavy whipping cream (36% to 40% fat content) produces the richest, creamiest result and the smoothest integration into hot coffee. It creates a creamer that closely mimics the body of commercial full-fat liquid creamers. The high fat content also makes it more stable against temperature shock from hot coffee.
Whole milk (3.25% fat) produces a lighter creamer with less body but lower calories per tablespoon. It integrates cleanly into hot coffee but produces a thinner pour with less of the coating mouthfeel that heavy cream delivers. Half-and-half at approximately 12% fat sits between the two and is the most commonly used option for a balanced result.
Why Homemade Creamer Behaves Differently From Commercial
Commercial liquid creamers use carrageenan, dipotassium phosphate, and mono and diglycerides as emulsifiers and stabilizers to prevent separation and maintain a uniform texture regardless of temperature. Homemade creamer doesn’t contain these additives, which means it will separate slightly in the refrigerator between uses and requires a brief shake before pouring.
This separation is not spoilage. It’s simply the natural behavior of an unemulsified dairy mixture where the fat and water phases partially separate at refrigerator temperatures. A 5-second shake before each use restores full homogeneity immediately.
Homemade creamer also has a shorter shelf life than commercial products because it lacks the preservatives and ultra-pasteurization treatment that extend commercial creamer’s stability. A properly stored homemade creamer in a sealed glass jar in the refrigerator at 38°F to 40°F stays fresh for 7 to 14 days depending on the fat source used.
Types and Variations of Homemade Coffee Creamer
Classic Vanilla Creamer
The classic vanilla creamer is the most versatile and widely made variation. It works as a daily driver with any coffee brewing method from drip to espresso and forms the base from which most other flavors are built.
The formula is 1 cup heavy cream or half-and-half plus 1 cup sweetened condensed milk plus 2 teaspoons pure vanilla extract. This produces approximately 16 oz of creamer at a sweetness and richness level comparable to Coffee Mate Natural Bliss Vanilla but with significantly fewer additives.
Pure vanilla extract from brands including Nielsen-Massey or McCormick Pure Vanilla produces a cleaner, more natural vanilla flavor than artificial vanilla flavoring. For a more intense vanilla character, split and scrape one vanilla bean directly into the mixture and allow it to steep for 24 hours in the refrigerator before straining.
Hazelnut Creamer
Hazelnut creamer uses the same base but substitutes hazelnut extract or hazelnut syrup for vanilla extract. The intensity of hazelnut extract varies significantly between brands, so start with 1 teaspoon per batch and taste before adding more.
Torani Hazelnut Syrup or Monin Hazelnut Syrup (available in 750 ml bottles) produces a more authentic hazelnut coffeehouse flavor than extract alone. Use 2 tablespoons of hazelnut syrup per batch in place of the extract and reduce the condensed milk quantity by 2 tablespoons to compensate for the additional sweetness the syrup introduces.
Caramel Creamer
Caramel creamer substitutes caramel sauce or caramel extract into the base mixture. Homemade caramel sauce made from sugar, butter, and cream produces the deepest, most authentic caramel flavor. Store-bought caramel sauce from brands including Trader Joe’s or Stonewall Kitchen works well as a time-saving alternative.
Add 3 tablespoons of caramel sauce to the base mixture and whisk vigorously until fully incorporated. The caramel sauce contains both fat and sugar that alter the final texture, so reduce the sweetened condensed milk to 0.75 cup when using caramel sauce to avoid an overly sweet result.
Dairy-Free and Vegan Variations
Dairy-free creamer replaces heavy cream with full-fat coconut milk (from a can, not the carton) and sweetened condensed milk with sweetened condensed coconut milk or sweetened condensed oat milk, both of which are available from brands including Nature’s Charm and Let’s Do Organic.
Full-fat canned coconut milk (17% to 22% fat) produces the richest dairy-free creamer and the most stable integration into hot coffee. It does add a mild coconut flavor that is detectable in lighter roast coffees but largely unnoticeable in dark roast or strongly flavored coffees.
Oat milk-based creamer using unsweetened barista-blend oat milk (such as Oatly Barista Edition) plus sweetened condensed oat milk produces the most neutral-flavored dairy-free result. It foams and integrates into hot coffee better than coconut-based versions and produces the cleanest flavor profile in light or medium roast applications.
Spiced and Seasonal Variations
Pumpkin spice creamer adds 2 tablespoons of pumpkin puree, 0.5 teaspoon cinnamon, 0.25 teaspoon ginger, 0.125 teaspoon nutmeg, and 0.125 teaspoon clove to the vanilla base. The pumpkin puree adds both flavor and body, though it also introduces starch that can cause slight thickening in the refrigerator. Shake thoroughly before each use.
Cinnamon dolce creamer uses the vanilla base with 1 teaspoon of cinnamon extract or 1 tablespoon of ground cinnamon plus 1 teaspoon of brown sugar in place of some condensed milk. Ground cinnamon doesn’t dissolve fully and will settle at the bottom of the jar between uses, requiring vigorous shaking before pouring.
Variation Comparison at a Glance
| Creamer Flavor | Base Fat Source | Primary Flavoring | Sweetness Level | Shelf Life | Best Brewing Match |
|---|---|---|---|---|---|
| Classic Vanilla | Heavy cream | Pure vanilla extract | Medium | 10 to 14 days | Any method |
| Hazelnut | Half-and-half | Hazelnut syrup | Medium-high | 7 to 10 days | Drip, French press |
| Caramel | Heavy cream | Caramel sauce | High | 7 to 10 days | Espresso, drip |
| Pumpkin Spice | Half-and-half | Pumpkin puree + spices | Medium | 7 days | Drip, Keurig |
| Dairy-Free Coconut | Full-fat coconut milk | Vanilla extract | Medium | 5 to 7 days | Dark roast drip |
| Dairy-Free Oat | Barista oat milk | Vanilla or hazelnut | Medium | 5 to 7 days | Light to medium roast |
Equipment That Makes the Process Easier
Saucepan and Stovetop for Cooked Variations
The basic shake-and-mix method requires no cooking equipment at all. However, cooked creamer recipes that involve infusing whole spices, dissolving sugar, or incorporating caramel require a small saucepan (1.5 to 2 quart capacity) with a heavy bottom to prevent scorching.
A stainless steel saucepan distributes heat evenly without reacting with dairy or sugar. Avoid non-stick pans for cream-based recipes since high-fat mixtures at even moderate temperatures can degrade some non-stick coatings over time. A simple 1.5-quart stainless All-Clad or Cuisinart saucepan handles every cooked creamer application efficiently.
For recipes involving simple syrup bases (dissolving sugar in water before adding to cream), use medium-low heat and stir continuously until the sugar is fully dissolved before adding dairy components. Adding dairy before the sugar is fully dissolved can cause crystallization that produces a grainy texture in the finished creamer.
Blender for Smooth Integration of Solids
When adding solid or semi-solid ingredients like pumpkin puree, nut butters, or cocoa powder to a creamer base, a blender produces a far smoother result than whisking by hand. Whisking can leave small lumps that settle to the bottom of the jar and cause inconsistent flavor delivery per tablespoon.
A personal blender like the NutriBullet Pro 900 (900W motor, 32 oz cup) handles a single creamer batch in 30 to 45 seconds and is easier to clean than a full-size blender for these small-batch applications. The narrow blending cup also minimizes the air incorporation that whisking can introduce, which can accelerate spoilage.
For smooth nut-based creamers or any recipe using ground spices, blend the finished mixture for 30 seconds before transferring to the storage jar.
Storage Jars and Dispensers
The storage container is a practical decision that affects both shelf life and daily convenience. 16 oz to 32 oz glass mason jars with tight-fitting lids are the most practical option for most batch sizes. Glass doesn’t absorb odors or flavors the way plastic does, and the wide-mouth design makes pouring and measuring easy.
Wide-mouth Ball mason jars in 16 oz (pint) size hold a standard single-batch recipe. 32 oz (quart) jars accommodate double batches for households that use creamer heavily. Avoid using jars with loose or worn-out lid seals since proper sealing is critical to the 7 to 14-day refrigerator shelf life.
A glass milk bottle or glass carafe with a pour spout is a more elegant storage option that allows controlled pouring without measuring. The Bormioli Rocco Fido Jar with its rubber gasket seal provides an excellent airtight closure that outperforms standard mason jar lids for maintaining freshness.
Step-by-Step: How to Make Homemade Coffee Creamer
Step 1: Gather and Measure All Ingredients
Measure all ingredients before starting. For a standard vanilla creamer batch, you need 1 cup (240 ml) heavy cream or half-and-half, 1 cup (one standard 14 oz can contains enough for the recipe) sweetened condensed milk, and 2 teaspoons pure vanilla extract.
Have a clean 16 oz mason jar or storage container ready with its lid nearby. If you’re making a cooked variation that requires heating, have your saucepan on the stovetop before beginning.
Step 2: Combine Ingredients
For the no-cook method, pour the sweetened condensed milk into the mason jar first, followed by the heavy cream or half-and-half. Add the flavoring extract last. The order doesn’t significantly affect the result but putting the condensed milk in first makes it easier to see when the proportions are right before adding the more fluid cream.
For cooked variations, combine the dairy components in the saucepan over medium-low heat and warm until the mixture reaches approximately 140°F to 160°F (just below a simmer) before adding spices or extracts. This gentle warming helps dissolve sugar and bloom spices more effectively than cold mixing.
Step 3: Mix Thoroughly
For the no-cook jar method, seal the lid tightly and shake vigorously for 15 to 20 seconds. Open and check that no condensed milk remains pooled at the bottom of the jar. If white, thick residue is visible at the bottom, seal and shake again for another 10 seconds.
For blended versions, transfer the mixture to a blender cup and blend on medium speed for 30 seconds. Do not blend at high speed for longer than 30 seconds since over-blending incorporates excessive air and can partially whip the cream, producing an inconsistent texture.
For cooked stovetop versions, whisk constantly while heating and remove from heat before adding extracts. Heat degrades volatile flavor compounds in vanilla and other extracts, so always add extracts off-heat after the mixture has cooled slightly to below 150°F.
Step 4: Taste and Adjust
Before sealing for storage, taste a small spoonful of the creamer and assess sweetness, richness, and flavor intensity. This is the only point at which adjustments can be made without disrupting a sealed batch.
If it’s too sweet, add 2 tablespoons of plain heavy cream and reshake. If the flavor extract isn’t detectable enough, add an additional 0.5 teaspoon and reshake. If the consistency is thinner than you prefer, reduce heavy cream by 0.25 cup and replace with an equal amount of condensed milk in the next batch.
Step 5: Store and Label
Seal the jar tightly and label it with the date of preparation and the flavor name. Without labeling, it’s easy to forget when a batch was made and lose track of its safe use window.
Refrigerate immediately at 38°F to 40°F. Keep the jar away from the refrigerator door since the repeated temperature fluctuations from opening and closing accelerate spoilage faster than the steady cold of an interior shelf.
Common Mistakes and How to Fix Them
Using Low-Fat or Skim Milk as the Fat Source
Low-fat milk (1%) or skim milk doesn’t contain enough fat to produce the rich, creamy body that makes homemade creamer satisfying. The result is a thin, watery liquid that separates more noticeably in coffee and doesn’t deliver the mouthfeel that makes creamer worth using.
Always use at minimum whole milk (3.25% fat) as the lower end of the fat scale for homemade creamer. Half-and-half (10% to 12% fat) produces a noticeably better result than whole milk for minimal additional cost. Heavy cream produces the richest result and is worth the extra calories if mouthfeel is a priority.
Not Shaking Before Each Use
Homemade creamer without commercial emulsifiers will separate in the refrigerator between uses as the fat globules migrate upward and the water-based components settle below. Pouring directly from a separated jar produces an inconsistent pour: the first tablespoon is mostly fat-rich cream, and the last tablespoons are mostly thin sweetened milk.
A 5-second shake before every use fully re-homogenizes the mixture and ensures consistent flavor, sweetness, and richness in every pour. Store the jar where it’s easy to grab and shake as a single motion before adding to coffee.
Adding Hot Creamer to Coffee Without Cooling
Adding freshly made warm creamer (from a stovetop recipe) directly to hot coffee while it’s still above 60°F can cause curdling when the dairy proteins encounter the acidity of the coffee. This produces small, curd-like flakes floating in the cup rather than a smoothly integrated creamer.
Always cool cooked creamer to refrigerator temperature before using it in coffee. If you’ve made a batch and want to use it immediately, set the jar in a bowl of ice water for 10 to 15 minutes before pouring. Never add a hot dairy mixture to hot coffee regardless of how fresh or high-quality the ingredients are.
Overloading With Extract
Flavoring extracts like peppermint, almond, and hazelnut are significantly more potent than vanilla and can overwhelm the base mixture at vanilla-equivalent quantities. Using 2 teaspoons of peppermint extract in a standard batch produces a nearly medicinal, mouthwash-like flavor that’s unpleasant in coffee regardless of how much you enjoy peppermint.
Start all non-vanilla extracts at 0.5 teaspoon per batch and taste before adding more. Most strongly flavored extracts reach their ideal level between 0.5 and 1 teaspoon per 16 oz batch. Vanilla is the exception to this rule since it requires 1.5 to 2 teaspoons to come through clearly.
Pro Tips for Better Homemade Creamer
Make a Sweetened Condensed Milk Substitute for Lower Sugar
Standard sweetened condensed milk contains approximately 22 grams of sugar per 2 tablespoons, which produces a creamer that’s quite sweet per tablespoon. For a less sweet creamer, make a quick substitute by combining 1 cup whole milk with 0.33 cup granulated sugar in a saucepan and cooking over low heat while stirring until the sugar dissolves and the mixture reduces by approximately one-third.
This substitute allows you to control the sweetness level precisely. Reducing the sugar to 0.25 cup produces a creamer that’s noticeably less sweet than standard commercial creamers while maintaining the same body and richness profile.
Use a Frother for Daily Use Convenience
An electric milk frother (such as the Zulay Kitchen Milk Frother, a Nespresso Aeroccino 3, or the Breville Milk Cafe with its 500 ml capacity and 500W heating element) warms and froths homemade creamer directly, transforming it from a standard creamer into a latte-style foam layer.
Warming homemade creamer to approximately 150°F in a frother before adding to coffee produces a more coffee-shop-like experience than cold creamer poured directly from the refrigerator. The Nespresso Aeroccino 3 takes approximately 60 seconds to reach optimal temperature and produces a stable foam from heavy cream-based homemade creamers consistently.
Freeze in Ice Cube Trays for Portioned Batches
Pouring finished creamer into a standard ice cube tray (approximately 1 oz per cube) and freezing produces individual portioned servings that can be transferred to a freezer bag and stored for up to 3 months. Drop one or two cubes directly into hot coffee and stir until melted.
This technique is particularly useful for flavored seasonal creamers like pumpkin spice or peppermint mocha that you want to make in large batches when ingredients are available but not consume daily. Freezing preserves flavor and prevents the short refrigerator shelf life from limiting batch size.
Frequently Asked Questions
How long does homemade coffee creamer last?
Homemade coffee creamer stored in a sealed glass jar in the refrigerator at 38°F to 40°F lasts 7 to 14 days depending on the fat source and ingredients used. Heavy cream-based creamers last closer to 14 days.
Whole milk-based creamers last 7 to 10 days. Creamers containing pumpkin puree, nut butters, or other perishable solids should be used within 5 to 7 days. Always check for off-smells, curdling, or visible mold before use.
Labeling the jar with the preparation date removes the guesswork from tracking freshness. Freezing individual portions in ice cube trays extends storage to 3 months.
Can I make coffee creamer without sweetened condensed milk?
Yes. A workable substitute combines 1 cup of whole milk with 0.33 cup of granulated or brown sugar cooked over low heat until the sugar fully dissolves and the mixture reduces slightly, approximately 10 to 15 minutes of gentle simmering.
This produces a less thick result than condensed milk since it lacks the same degree of water evaporation, but the flavor and sweetness profile are comparable.
Maple syrup and honey can also substitute for condensed milk at a 1:1 ratio by volume, producing slightly thinner creamers with distinct flavor profiles that work well in specific flavored variations like cinnamon maple or honey vanilla.
Why does my homemade creamer curdle in coffee?
Curdling occurs when dairy proteins destabilize under the combined effects of coffee’s acidity and heat. The most common causes are using low-fat dairy that lacks the stabilizing fat content of heavier cream, adding warm freshly made creamer to hot coffee before it has chilled, or using coffee that is extremely acidic (typically light roast single-origin coffees).
The fix is to use half-and-half or heavy cream as the fat source, ensure the creamer is fully refrigerator-cold before using, and if the problem persists, switch to a darker roast coffee with lower acidity. Adding a small pinch of baking soda to the creamer batch neutralizes acidity and reduces curdling risk.
What is the best fat source for homemade creamer?
Heavy whipping cream at 36% to 40% fat produces the richest, most stable homemade creamer with the smoothest integration into hot coffee and the lowest curdling risk. Half-and-half at 10% to 12% fat is the most practical everyday choice that balances richness, calorie content, and cost effectively.
Whole milk produces a lighter creamer suitable for those monitoring fat intake but delivers noticeably less body. For dairy-free options, full-fat canned coconut milk produces the richest non-dairy creamer. Barista-blend oat milk produces the most neutral-flavored dairy-free base. The fat source is the single most impactful variable for creamer texture and coffee integration quality.
How do I make flavored homemade coffee creamer?
Add flavoring extracts, syrups, or spice blends directly to the base mixture of sweetened condensed milk and your chosen dairy before shaking or blending. For vanilla, use 2 teaspoons of pure vanilla extract per 16 oz batch. For hazelnut, use 1 to 2 tablespoons of hazelnut syrup from brands like Torani or Monin.
For caramel, add 3 tablespoons of caramel sauce. For spiced variations like pumpkin spice or cinnamon, add ground spices and blend thoroughly rather than just shaking since ground spices don’t dissolve. Start with conservative quantities for strongly flavored extracts like peppermint or almond (0.5 teaspoon) and taste before adding more.
How many calories are in homemade coffee creamer per tablespoon?
A standard homemade vanilla creamer made with equal parts heavy cream and sweetened condensed milk contains approximately 60 to 70 calories per tablespoon. This is comparable to or slightly higher than Coffee Mate Natural Bliss (35 calories per tablespoon) but with significantly cleaner ingredients.
Using half-and-half instead of heavy cream reduces the calorie count to approximately 40 to 50 calories per tablespoon. Using whole milk reduces it further to approximately 30 to 40 calories per tablespoon.
Dairy-free versions made with full-fat coconut milk are similar in calorie count to heavy cream versions at approximately 55 to 65 calories per tablespoon due to coconut milk’s high fat content.
Can I use maple syrup instead of sweetened condensed milk?
Yes, maple syrup works as a substitute but produces a thinner creamer with a distinct maple flavor that suits certain variations (cinnamon maple, vanilla maple) and less suitable for neutral vanilla or hazelnut applications where the maple flavor may conflict. Use maple syrup at a 1:1 ratio by volume in place of sweetened condensed milk.
The resulting creamer will be less thick and require more vigorous shaking before use since maple syrup and cream separate more readily than the condensed milk base. Grade B or dark amber maple syrup delivers more flavor intensity per tablespoon than lighter grades, requiring less syrup per batch to achieve the desired sweetness.
Does homemade coffee creamer need to be refrigerated?
Yes, always. Homemade coffee creamer contains fresh dairy ingredients with no preservatives or ultra-pasteurization treatment and must be refrigerated at all times. Leaving it at room temperature for more than 2 hours creates conditions for rapid bacterial growth that makes it unsafe to consume even if it appears unchanged.
Store it on an interior refrigerator shelf rather than the door to minimize temperature fluctuations. Never leave homemade creamer on the counter while drinking coffee and return it to the refrigerator immediately after each use. Unlike commercial shelf-stable creamers, homemade versions cannot be stored in a pantry or at room temperature under any circumstances.
What equipment do I need to make homemade coffee creamer?
The no-cook shake method requires only a 16 oz mason jar with a tight lid, measuring cups, and the ingredients themselves. No additional equipment is needed. For cooked variations involving simple syrups or spice infusions, a small 1.5 to 2 quart stainless steel saucepan and a whisk are sufficient.
For smoothly blended variations incorporating pumpkin puree, nut butters, or ground spices, a personal blender like the NutriBullet Pro 900 produces the most homogeneous result in the shortest time.
A kitchen scale accurate to 1g improves consistency for those who want to replicate exact batches. A funnel helps transfer the finished creamer cleanly into narrow-mouth storage bottles without spilling.
Conclusion
Making homemade coffee creamer consistently produces a better-tasting result than commercial alternatives at lower cost per serving and with complete control over ingredients. The base formula of sweetened condensed milk plus a quality fat source covers every flavor variation, and the process takes under five minutes from measuring to sealing the jar.
The three decisions that determine your result are fat source (heavy cream for richness, half-and-half for balance, whole milk for lighter body), flavoring approach (pure extract for clean flavor, commercial syrups for coffeehouse character, ground spices for seasonal warmth), and storage discipline (sealed glass jar, interior refrigerator shelf, labeled with preparation date, shaken before every use).
Anyone making homemade coffee creamer for the first time should start with the classic vanilla version using half-and-half, sweetened condensed milk, and pure vanilla extract. Make one batch, use it daily for a week, and adjust the fat source and sweetness level based on your honest taste response. From that calibrated starting point, every flavored variation becomes a straightforward adjustment to a formula you already know works.