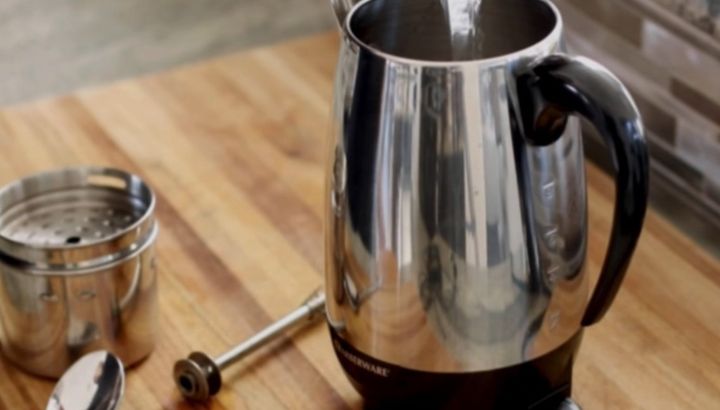
To make coffee in an electric percolator, fill the lower chamber with cold filtered water to just below the maximum fill line, add one tablespoon of medium-coarse ground coffee per cup to the filter basket, assemble the percolator fully, plug it in, and allow it to complete its automatic brew cycle of 7 to 12 minutes before serving.
Use a medium-coarse grind specifically calibrated for percolator brewing since standard drip grind is too fine and causes sediment and over-extraction, while too coarse a grind produces weak, under-extracted output that tastes thin and lacks body.
Most electric percolators self-regulate brewing temperature and shut off or switch to a keep-warm setting automatically when brewing completes. Serve immediately or within 30 minutes for best flavor since percolated coffee held on continuous heat degrades quickly.
If you’ve inherited an electric percolator or bought one specifically for its capacity and classic brewing style, you may be surprised to discover there’s considerably more technique involved than simply adding water, adding coffee, and pressing a button. Percolator coffee has an undeserved reputation for being bitter and over-extracted, and that reputation comes almost entirely from people using the wrong grind size, the wrong coffee-to-water ratio, or ignoring the keep-warm transition point that every electric percolator crosses within minutes of brew completion.
The electric percolator is genuinely capable of producing rich, full-bodied, deeply flavorful coffee that stands apart from drip machine output in both character and warmth. The key is understanding how the internal cycling mechanism works, why grind size matters more in a percolator than almost any other brewing method, and which specific operating habits produce the consistent results that make percolator coffee worth the slightly longer brew time.
This guide covers every step, every variable, and every component of electric percolator use, from how the internal pump tube system works to the specific grind settings that work best on the most popular models, including detailed maintenance guidance that extends performance and prevents the flavor contamination that ruins many percolator brewing sessions.
How an Electric Percolator Works
The Pump Tube and Cycling Mechanism
The electric percolator’s internal brewing mechanism is one of the oldest and most elegant continuous-cycle coffee brewing systems ever designed. At the center of every percolator is a vertical pump tube that runs from the very bottom of the water chamber up through the stem to a spreader plate or spray head positioned above the coffee grounds basket.
When the heating element at the base of the percolator heats the water, bubbles form at the bottom of the pump tube where the water temperature is highest. These bubbles rise through the tube faster than the surrounding water, creating an upward flow of hot water that carries the heated liquid to the top of the percolator where it emerges from the spread plate.
The heated water falls from the spreader plate down through the coffee grounds in the filter basket, extracting flavor compounds as it passes through. It then drips through the perforations in the basket bottom back into the main water chamber, where it heats again and rises through the pump tube once more. This is the percolation cycle that gives the brewing method its name.
The cycle repeats continuously throughout the brewing period. Unlike a drip machine that passes fresh cold water through the grounds once, a percolator passes the same increasingly concentrated coffee liquid through the grounds repeatedly. This repeated cycling is why grind size and brewing time are so critical: too fine a grind combined with too long a cycle produces heavily over-extracted, bitter coffee, while the right grind and correct timing produces a rich, round cup with excellent body.
The Heating Element and Temperature Control
Electric percolators use a resistive heating element embedded in the base of the unit, typically rated between 400W and 1500W depending on the size and design of the model. The element heats the water in the main chamber to a continuous cycling temperature, and in automatic models, a built-in thermostat monitors the temperature and adjusts the element’s output to maintain the brewing temperature within a target range.
Most quality electric percolators cycle at water temperatures between 185°F and 205°F during the active brewing phase. The target brewing temperature in a percolator is slightly lower than ideal drip brewing temperature because the repeated cycling means coffee is in contact with hot liquid for a longer total time, and higher temperatures would accelerate over-extraction dramatically.
When the thermostat detects that the brewing cycle is complete (indicated by the water temperature rising as the liquid concentration changes), it reduces element output to a keep-warm level that maintains serving temperature without continuing to push liquid through the coffee grounds at the same rate. This automatic transition is the most important feature of a modern electric percolator and is what distinguishes it from older manually controlled models.
The Filter Basket and Grounds Management
The filter basket in an electric percolator sits above the main water chamber, threaded or clipped onto the top of the pump tube stem. It’s typically a shallow, perforated metal or plastic basket with a removable lid that holds the coffee grounds in contact with the cycling water while preventing them from falling into the main brew chamber below.
The perforations in the basket bottom are large enough to allow the brewed coffee to pass through but small enough to retain most of the ground coffee. This is why grind size is the single most consequential variable in percolator brewing. Grinds fine enough to pass through the basket perforations end up in the finished coffee as sediment and contribute bitter compounds to the brew through over-extraction in the main chamber.
Some percolators include a paper filter basket insert or accommodate standard basket-style paper filters. Using a paper filter in a percolator reduces sediment and produces a cleaner cup, though it also slightly reduces the body that is one of percolated coffee’s distinguishing characteristics. For sediment-sensitive drinkers, the paper filter option is worthwhile.
Electric Percolator Types and Variations
Stainless Steel Electric Percolators
Stainless steel electric percolators are the most durable and widely recommended category for regular home use. Models like the Presto 02811 12-Cup Stainless Steel and the Farberware FCP412 12-Cup are built from 18/8 food-grade stainless steel that resists staining, odor absorption, and corrosion from repeated coffee brewing.
Stainless steel models typically have removable heating bases where the stainless carafe detaches for serving and cleaning while the base unit stays on the countertop. The lid, basket, and pump tube assembly all lift out as individual pieces, making thorough cleaning straightforward compared to models where components are permanently integrated.
The Presto 02811 is the most frequently recommended home percolator for both beginners and experienced users. It brews 2 to 12 cups (with a 120V, 1000W heating element) and includes a permanent filter basket with basket lid, a removable pump tube assembly, and an indicator light that shows when the coffee is ready.
Aluminum Electric Percolators
Aluminum percolators are lighter and less expensive than stainless steel models but have drawbacks that make them less suitable for daily home use. Aluminum reacts with coffee’s natural acids over time and can develop a metallic taste contribution to the brew, particularly in models that are not thoroughly cleaned between uses or that use hard, chlorinated water.
Aluminum percolators are more common in stovetop camp percolator designs than in electric home models, but some budget electric models use aluminum components in the basket or pump tube assembly even when the carafe is stainless steel. Checking the material specifications of each component before purchasing identifies potential flavor contamination risks.
For occasional or emergency use, aluminum percolators are entirely functional. For daily brewing where cup quality consistency matters, stainless steel is the clear choice at only a modest price premium over aluminum alternatives.
Large Capacity Percolator Urns
Electric percolator urns serve a different purpose than home countertop percolators. Models like the Farberware FCP516 16-Cup, the NESCO CU-30 30-Cup, and the Hamilton Beach 40515R 45-Cup are designed for serving groups, offices, church halls, and events where brewing large quantities quickly matters more than producing artisan-quality single cups.
These larger units operate at higher wattages (1000W to 1500W) to handle the greater water volume and maintain serving temperature across the entire larger chamber. They use the same pump tube cycling mechanism as home-size units but with proportionally larger components scaled to the capacity.
Coffee quality from large percolator urns is generally lower than from well-maintained home units because precise coffee-to-water ratio control across 30 to 45 cups is difficult without a kitchen scale, and large batches are almost always held on keep-warm for extended periods that progressively degrade flavor.
Vintage and Manual Electric Percolators
Older manual electric percolators without automatic thermostat shutoff require the user to monitor the brewing process and manually cut power when the cycle has run for the correct duration. These units are still found at estate sales and thrift stores and can produce excellent coffee when used correctly.
The critical difference in using a manual percolator is that the user must time the brew cycle from the moment the first percolation sounds begin (a soft bubbling sound from the spout or indicator knob) and unplug the unit at the 7 to 10 minute mark. Leaving a manual percolator running unattended produces severely over-extracted, acrid coffee because there’s no automatic transition to keep-warm mode.
| Percolator Type | Wattage | Capacity | Material | Best Use Case |
|---|---|---|---|---|
| Presto 02811 Stainless | 1000W | 2 to 12 cups | Stainless steel | Daily home brewing |
| Farberware FCP412 | 1000W | 2 to 12 cups | Stainless steel | Home, light commercial |
| NESCO CU-30 Urn | 1000W | 30 cups | Stainless steel | Office, gatherings |
| Hamilton Beach 45-Cup | 1500W | 45 cups | Stainless steel | Large events, church halls |
| Vintage manual unit | 400W to 800W | 8 to 24 cups | Aluminum or stainless | Occasional use with monitoring |
What You Need Before You Start
Selecting the Right Coffee Grind
The single most important pre-brewing decision for percolator coffee is grind size. Percolator grind sits between standard drip grind and French press grind in coarseness, typically described as medium-coarse with particles roughly the size of coarse sea salt or slightly larger.
On a Baratza Encore burr grinder, target setting 28 to 32 out of 40 for percolator use. On a Breville Smart Grinder Pro, set 30 to 36 out of 60. On a Fellow Ode Gen 2, use 8 to 9 out of 11. These settings produce a coarse enough grind to stay in the basket without passing through the perforations while allowing the repeated cycling water to extract efficiently without over-extracting bitterness.
Using standard drip grind (medium-fine) in a percolator creates two simultaneous problems. Fine particles fall through the basket perforations and accumulate in the main chamber where they continue extracting bitterness throughout the entire brew cycle. The remaining medium-fine grounds in the basket also over-extract during the repeated cycling because their surface area is too high relative to the contact time.
Coffee Beans and Roast Selection
Medium to dark roast coffees perform best in a percolator because the repeated heat cycling amplifies the heavier roasted notes that these coffees produce while moderating the bright acidic notes that would become shrill under repeated heat exposure. Light roasts in a percolator frequently produce a flat, stale-tasting cup because their more delicate aromatic compounds don’t survive the repeated heating cycle.
Whole bean coffee ground fresh immediately before brewing produces noticeably better percolated coffee than pre-ground. The slightly longer brew time of a percolator (compared to drip) means that oxidized pre-ground coffee has more time to contribute flat, stale notes to the finished brew. A burr grinder producing consistent medium-coarse particles ensures even extraction throughout the cycling process.
Robusta-heavy commercial blends actually perform better in percolators than in filter brewing because the percolator’s heating process moderates some of the harsh rubbery notes that robusta produces in other methods while amplifying its intensity and crema-like body. This is historically why percolated diner coffee, which often used robusta-heavy commercial blends, tasted more satisfying than the same blend brewed through a drip machine.
Water Quality and Temperature
Use cold filtered water to fill the percolator reservoir. Percolators are particularly sensitive to water quality because the water is heated repeatedly and any mineral or chlorine contribution concentrates slightly with each cycle. In hard water areas, scale accumulates on the heating element faster in a percolator than in a single-pass drip machine because the heating element processes the same water multiple times per brew cycle.
Filtered water from a Brita or PUR pitcher filter provides adequate mineral reduction and chlorine removal for percolator use. Distilled water is not recommended since it lacks the mineral content that supports coffee extraction and produces flat-tasting results. The ideal total dissolved solids for percolator water is 50 to 150 ppm, which most filtered municipal water falls within.
Always start with cold water rather than hot or warm water. Pre-heating the water before adding it to a percolator shortens the initial heat-up time but also reduces the thermal mass that helps moderate the initial brewing temperature, potentially causing the first few cycles to run too hot before the thermostat stabilizes the temperature.
Step-by-Step Guide to Making Coffee in an Electric Percolator
Step 1: Disassemble and Inspect the Percolator
Before adding any ingredients, disassemble the percolator completely: remove the lid, lift out the filter basket and basket lid, and pull out the pump tube assembly from the base. Inspect each component for coffee residue, oil buildup, or mineral deposits that would contaminate the new batch.
Rinse all components under warm running water if the percolator was last used within 24 hours. If it hasn’t been used recently, wash the basket, basket lid, and pump tube with warm soapy water and a soft brush before proceeding. Old coffee oils in any of these components produce a rancid taste in fresh coffee, which is one of the most common complaints about percolator coffee from users who don’t clean between every use.
Step 2: Fill the Water Chamber
Pour cold filtered water into the main percolator chamber to your desired brew level. Most electric percolators have marked fill lines on the inside of the chamber corresponding to cup counts. The Presto 02811 marks fill levels from 2 cups to 12 cups in 2-cup increments.
Do not fill above the maximum fill line. Overfilling leaves insufficient headspace for the pump tube to function correctly and can cause water to overflow from the spout or lid during the initial heat-up phase when steam pressure begins building. Fill to exactly the desired mark with the pump tube temporarily out of the chamber so you can read the markings clearly.
Step 3: Measure and Add Coffee to the Basket
Add the measured, freshly ground coffee to the filter basket. The standard percolator ratio is 1 tablespoon of medium-coarse ground coffee per 1 cup (6 oz) of water, which produces a cup comparable in strength to standard drip coffee.
For stronger coffee, increase to 1.5 tablespoons per cup. For milder coffee, use 0.75 tablespoons per cup. Do not use a kitchen measuring tablespoon loosely filled, which varies significantly in volume. Use a level tablespoon measured with a standard measuring spoon, or use a kitchen scale at approximately 6g to 8g per 6 oz cup for the most reproducible results.
Do not overfill the filter basket above its capacity line. Overfilling compresses the grounds, which can partially block the basket perforations and slow the cycling rate, causing uneven extraction and potentially forcing the percolator’s thermostat into a premature shutoff before adequate extraction is achieved.
Step 4: Assemble the Percolator Fully
Insert the pump tube into the base fitting at the center bottom of the water chamber. Most pump tubes have a notch or flat side that aligns with a corresponding fitting in the base to prevent rotation during the brewing cycle. Seat it firmly until it’s fully engaged.
Slide the filter basket onto the top of the pump tube stem. The basket should sit flat and level without wobbling. Place the basket lid on top of the grounds and press it gently into place. The basket lid prevents grounds from being washed out of the basket during the vigorous cycling of the initial heat-up phase when water flow rates are highest.
Place the main percolator lid onto the top of the unit and ensure it’s seated fully around its rim. A loose lid allows steam to escape and reduces the pressure consistency that drives even percolation cycling throughout the brew.
Step 5: Plug In and Begin the Brew Cycle
Place the assembled percolator on a heat-safe, stable countertop surface away from cabinet edges where steam from the spout could damage finishes. In models with a detachable base (like the Farberware FCP412), set the carafe onto the base and connect the power cord to the base before plugging into the wall outlet.
Plug the unit in or switch the power switch to the ON position. Most automatic electric percolators have an indicator light that illuminates when power is active. Listen for the first percolation sounds within 3 to 5 minutes as the water reaches cycling temperature and begins rising through the pump tube.
Step 6: Monitor the Brew Cycle and Recognize Completion
The active brewing period of an electric percolator runs from the first audible percolation sounds to the automatic transition to keep-warm mode. This active period typically lasts 7 to 12 minutes depending on the wattage of the heating element, the volume of water being brewed, and the ambient temperature of the water when brewing started.
For automatic models including the Presto 02811 and Farberware FCP412, a separate indicator light switches on when keep-warm mode activates, signaling that brewing is complete. Some models have a single light that changes color or intensity to indicate the transition. For models without a light indicator, listen for the percolation sound to slow from a steady pulse to occasional irregular sounds, which indicates the thermostat has reduced the element output.
Step 7: Disassemble the Basket Before Serving
Immediately after the brew cycle completes and before pouring, open the lid and carefully remove the basket assembly and pump tube from the percolator. This step is critical and is the one most users skip, causing the most common complaint about percolated coffee: bitterness that develops during the keep-warm period.
With the basket removed, the coffee in the chamber is no longer in contact with spent grounds. The keep-warm heating element can then maintain serving temperature for 30 to 60 minutes without driving additional extraction from the grounds. Leaving the basket in the percolator during the keep-warm period continues the extraction cycle at a lower rate, producing progressively more bitter and astringent coffee the longer it sits.
Set the hot basket assembly on a heat-safe dish or rinsing rack while you serve the coffee. This simple 20-second step is the difference between a percolator that produces excellent coffee and one that earns the reputation for bitter results.
Step 8: Serve and Store Correctly
Pour from the percolator carafe directly through the spout into cups or a separate thermal carafe. Most electric percolator carafes have a pour-through spout built into the lid that allows serving without removing the lid. Use a kitchen towel or oven mitt on the handle since the stainless steel body retains significant heat immediately after brewing.
For optimal flavor, serve within 20 to 30 minutes of brewing completion. After 30 minutes, even without the basket in place, the coffee begins oxidizing and developing stale, flat notes from the extended keep-warm heat exposure. If you need to hold coffee for longer, pour the finished brew into a pre-warmed thermal carafe immediately after removing the basket, which maintains temperature through insulation rather than continued heat input.
Read More: How Does a Coffee Maker Work
Common Mistakes and How to Fix Them
Using the Wrong Grind Size
Using drip-grind coffee in a percolator is the most common reason percolator coffee tastes over-extracted and bitter. Drip grind has a medium-fine particle size calibrated for a single pass of hot water in under 5 minutes. In a percolator, the same water passes through those fine grounds repeatedly for 7 to 12 minutes, producing a level of extraction that would make even exceptional coffee taste harsh.
If you’ve only purchased pre-ground coffee and it’s labeled for drip use, reducing the coffee dose by approximately 25% and reducing the brew cycle time by monitoring for the keep-warm transition earlier than you normally would partially compensates for the finer grind. But the correct fix is always to use an appropriately coarse grind from the start.
Leaving the Basket in During Keep-Warm
Leaving the filter basket and pump tube in the percolator after brewing completes is the second most common mistake and produces the same bitter result as using too fine a grind. Even in keep-warm mode where the full percolation cycle has slowed, the residual heat circulates the coffee past the grounds at a reduced rate that still extracts additional bitterness over 20 to 60 minutes.
Remove the basket and pump tube immediately when the brew indicator light changes or when percolation sounds become irregular. Build this step into the serving routine so it becomes automatic: open the lid, remove basket assembly, set aside, pour coffee. The habit takes less than 30 seconds and eliminates the most common cause of bitter percolated coffee.
Using Too Much Coffee
Over-dosing the filter basket, particularly with a medium-fine grind, compresses the coffee bed and creates flow resistance that slows the percolation cycling rate. The thermostat in automatic models may then detect the slower cycling as a brewing completion signal and switch to keep-warm mode before adequate extraction is achieved, producing a paradoxically weak and over-extracted cup simultaneously with flat body and astringent finish.
Measure coffee doses consistently with measuring spoons or a scale rather than estimating by eye. The basket fill line is a maximum capacity indicator, not a target. Staying at or slightly below the marked capacity produces better results than filling completely to the line.
Pro Tips for the Best Percolated Coffee
Preheat the Carafe Before Brewing
A cold stainless steel percolator carafe draws heat from the water during the initial heat-up phase and can contribute to inconsistent early-cycle temperature. Rinse the carafe interior with the hottest water from your tap and let it stand for 60 seconds before adding the cold brew water.
This preheating step reduces the thermal mass the heating element must overcome during the first few minutes of operation. The result is a faster and more even initial heat-up phase and more consistent percolation cycling from the start of the brew cycle rather than the variable early-cycle behavior that cold carafes produce.
Use a Coarser Grind in Summer
Ambient kitchen temperature affects the initial cycling temperature in an electric percolator because the starting water temperature is higher in warm weather. In summer, increase your grind size by one step coarser from your normal winter setting to compensate for the slightly faster cycling rate that warmer ambient conditions produce.
This seasonal adjustment is a small refinement that matters most for people who drink percolated coffee daily and have noticed that their results vary between seasons without any change in their technique. The Baratza Encore setting that produces ideal results at setting 30 in January may need to move to setting 32 in August for equivalent results.
Bloom the Grounds Before Full Assembly
For the richest, most even extraction from freshly roasted coffee, try a modified bloom step before final assembly. Fill the basket with grounds and pour 2 to 3 tablespoons of room-temperature water over them before placing the basket lid on. Let the grounds absorb this water for 30 seconds before assembling the percolator.
This pre-wetting step releases CO2 from freshly roasted beans and allows more immediate water absorption when the cycling begins. The result is more even extraction from the first percolation cycle rather than the initial resistance that dry grounds in a sealed basket can create.
Maintenance and Cleaning for Consistent Performance
After Every Use
After every brewing session, disassemble the percolator completely: remove the lid, basket lid, filter basket, and pump tube. Discard the spent grounds immediately and rinse every component under warm running water while they’re still warm. Coffee oils adhere to surfaces quickly as they cool and are significantly harder to remove from a basket that has sat for several hours.
Wash the filter basket with warm soapy water and a soft bottle brush after every use, paying close attention to the perforation holes where grounds accumulate. A toothpick clears individual clogged perforations that a brush can’t reach. Allow all components to air dry completely before reassembling for storage since moisture in a stored percolator promotes mold growth and mineral spotting.
Weekly Deep Cleaning
Once a week, wash the percolator carafe interior, pump tube, and basket assembly with a baking soda and warm water solution (2 tablespoons baking soda per quart of warm water) and allow it to soak for 10 minutes before scrubbing with a soft sponge. Baking soda is mildly alkaline and dissolves coffee oils without the harsh scratching that abrasive cleaners would produce on stainless steel surfaces.
Rinse thoroughly after the baking soda wash since any residual alkaline solution will alter the flavor of the next brew. A final rinse with plain cold water followed by a short brew cycle of clean water before the first real coffee batch of the week ensures no cleaning residue remains in the pump tube or heating element area.
Descaling Every 2 to 3 Months
Mineral scale accumulates on the heating element at the base of the percolator at a rate determined by water hardness and brewing frequency. In hard water areas above 120 ppm, visible white deposits may appear on the base of the carafe interior and on the lower pump tube after as few as 6 to 8 weeks of daily use.
To descale, fill the percolator to the maximum line with a 50/50 solution of white distilled vinegar and cold water. Run a complete brew cycle without any coffee in the basket. After the cycle completes, allow the vinegar solution to sit in the carafe for 30 minutes before discarding. Run two complete cycles of clean cold water through the percolator before the next coffee brewing session to eliminate all vinegar residue from the heating element and pump tube.
Frequently Asked Questions
How long does it take to make coffee in an electric percolator?
An electric percolator typically takes 7 to 12 minutes from plug-in to brew completion for a standard 8 to 12 cup batch. The timing varies based on the machine’s wattage, the starting temperature of the cold water, and the ambient kitchen temperature.
The initial heat-up phase takes 3 to 5 minutes before the first percolation cycling sounds begin. The active brewing period where water cycles through the grounds takes another 4 to 7 minutes. Modern automatic percolators switch to keep-warm mode automatically when the cycle completes. Manual models require monitoring and manual power cutoff at the 7 to 10 minute mark after the first percolation sounds begin.
What grind is best for an electric percolator?
The best grind for an electric percolator is medium-coarse, with particles roughly the size of coarse sea salt or slightly larger. On a Baratza Encore, target settings 28 to 32 out of 40. On a Breville Smart Grinder Pro, use settings 30 to 36 out of 60.
This coarseness prevents grounds from falling through the basket perforations into the main chamber and prevents over-extraction during the repeated cycling that percolation produces.
Standard drip grind (medium-fine) is too fine for a percolator and consistently produces bitter, astringent coffee with visible sediment in the cup. Always grind fresh immediately before brewing for the best flavor results.
How much coffee do I put in an electric percolator?
Use one tablespoon of medium-coarse ground coffee per 6 oz cup of water as the standard starting ratio. For a 12-cup percolator brewing to the maximum 12-cup fill line, this means 12 level tablespoons (approximately 72g to 96g depending on grind coarseness and dose density).
For stronger coffee, increase to 1.5 tablespoons per cup. For milder coffee, reduce to 0.75 tablespoons per cup. Measuring consistently with actual measuring spoons or a kitchen scale produces more repeatable results than estimating by eye.
Do not fill the basket above its marked capacity line since overfilling restricts water flow through the grounds and produces uneven extraction.
Why is my percolator coffee bitter?
Percolator coffee bitterness has three primary causes. First, the grind is too fine: standard drip grind over-extracts during the repeated cycling. Switch to a medium-coarse grind.
Second, the basket is left in during keep-warm: even low-heat cycling continues extracting bitterness from spent grounds after brewing completes. Remove the basket and pump tube immediately when the brew indicator signals completion.
Third, the brew cycle ran too long: if the percolator’s thermostat is malfunctioning or doesn’t have automatic shutoff, extend brew times extract bitter tannins. Monitor the cycle and intervene manually at the 10-minute mark if the keep-warm transition doesn’t occur automatically.
Can I use regular pre-ground coffee in an electric percolator?
Yes, but the results depend heavily on the grind coarseness of the pre-ground coffee. Most pre-ground coffee sold for drip machines uses a medium-fine grind that is too fine for percolator use and will produce bitter, sediment-heavy coffee with repeated cycling.
Pre-ground coffee specifically labeled for percolator brewing uses a medium-coarse grind calibrated for the percolation method.
Brands including Folgers Classic Roast and Eight O’Clock Original sell pre-ground options that work acceptably in a percolator when used at the correct ratio. For the best results, purchase whole beans and grind fresh to a medium-coarse setting immediately before each use.
Should I use hot or cold water in an electric percolator?
Always start with cold filtered water in an electric percolator. Cold water provides the correct thermal mass for the heating element to work through consistently and allows the percolator’s thermostat to regulate the cycling temperature accurately from the beginning of the brew cycle.
Using pre-heated water shortens the initial heat-up time but reduces the thermal regulation accuracy since the thermostat is calibrated for cold-start operation. It can also cause the first percolation cycles to run at higher temperatures than intended before the thermostat stabilizes the system, accelerating early extraction of bitter compounds before the cycle settles into its intended temperature range.
How do I know when my electric percolator is done brewing?
Most automatic electric percolators have an indicator light that changes state when the thermostat detects brew completion and switches to keep-warm mode. On the Presto 02811 and Farberware FCP412, this indicator changes from a brewing-phase illumination to a keep-warm signal.
Additionally, the percolation sounds (a rhythmic bubbling or gurgling from the spout or knob area) slow from a regular pulse to occasional irregular sounds when the thermostat reduces element output.
For manual percolators without automatic indicators, begin timing from the first percolation sounds and cut power at 7 to 10 minutes depending on your strength preference and grind coarseness.
How often should I clean my electric percolator?
Rinse all removable components under warm water after every single use and wash the filter basket with warm soapy water after every session. Perform a more thorough baking soda soak and scrub of all internal surfaces weekly to remove accumulated coffee oil oxidation.
Descale the heating element and internal chamber with a 50/50 white vinegar and water solution every 2 to 3 months under normal use, or every 4 to 6 weeks in hard water areas above 120 ppm total dissolved solids.
The pump tube requires particular attention during cleaning since coffee oils accumulate in its narrow bore and can restrict flow or impart off-flavors to subsequent brews if not regularly cleared.
Is percolated coffee stronger than drip coffee?
Percolated coffee is typically stronger than standard drip coffee when brewed at equivalent ratios because the repeated cycling through the grounds produces more total extraction than a single drip pass.
A 1 tablespoon per cup dose produces a cup comparable to or slightly stronger than drip coffee at the same ratio. Coffee percolated at a higher dose or for a longer cycle time produces noticeably bolder, fuller-bodied coffee with higher dissolved solids than drip brewing.
Percolated coffee also retains more natural oils than paper-filtered drip coffee since most percolator baskets use metal perforations rather than paper, which produces a heavier, more textured mouthfeel.
Conclusion
Mastering how to make coffee in an electric percolator comes down to three principles that must be applied consistently: use a medium-coarse grind that prevents over-extraction during repeated cycling, measure the coffee dose accurately at one tablespoon per cup, and remove the basket assembly immediately when the keep-warm indicator signals brew completion.
Get these three variables right and the percolator produces coffee that has no business being described by the reputation it’s accumulated from poor technique and neglected maintenance.
The electric percolator rewards consistent attention in a way that simpler brewing methods don’t. Its brew quality ceiling is genuinely high for a full-bodied, richly flavored cup that suits people who want more extraction character than standard drip provides without the equipment investment of an espresso machine. The Presto 02811 and Farberware FCP412 represent the performance benchmark in the home percolator category, combining reliable automatic thermostat control, durable stainless steel construction, and accessible pricing that makes them worth recommending as the starting point for any new percolator buyer.
Regular descaling every 2 to 3 months, weekly basket cleaning, and the daily habit of removing the basket before keep-warm mode begins will keep a quality electric percolator producing excellent coffee for 10 or more years, making it one of the best long-term value propositions in any category of home coffee equipment.