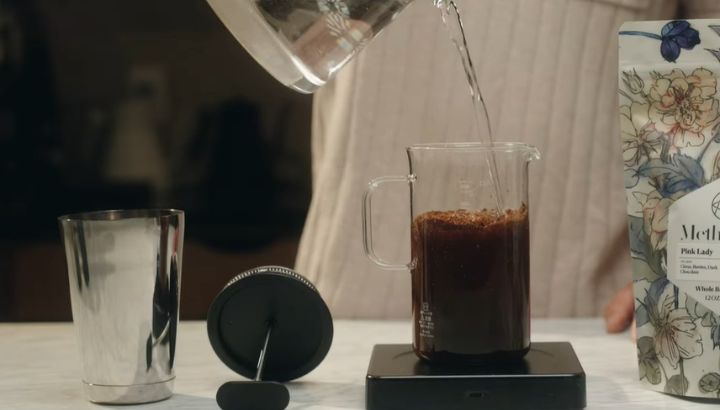
To make cold brew coffee with ground coffee, combine coarsely ground coffee with cold filtered water at a 1:5 ratio by weight in a mason jar or dedicated cold brew vessel, stir to ensure full saturation, cover and steep in the refrigerator for 12 to 24 hours, then strain through a fine-mesh strainer lined with cheesecloth or a paper filter into a clean storage container.
The grind must be coarse, roughly the texture of raw turbinado sugar crystals, since fine or medium-ground coffee over-extracts during the long cold steep and produces a bitter, astringent concentrate that no amount of dilution fully corrects.
The finished concentrate keeps refrigerated in an airtight container for up to two weeks and is served diluted 1:1 with cold water or milk before drinking since the concentrated output is too strong and thick to drink straight from the jar.
Pre-ground coffee is what most people have on hand, and the good news is that it works perfectly well for cold brew when you understand two critical adjustments. Pre-ground coffee sold for drip machines is typically a medium-fine grind, which is too fine for cold brew and will over-extract during a long refrigerator steep. The fix is either to use a coarser pre-ground specifically, use a burr grinder to regrind medium pre-ground coffee one step coarser, or adjust your steep time and ratio to compensate.
Once those two variables are aligned, cold brew with ground coffee is one of the most forgiving brewing methods available. There’s no temperature control needed, no precise timing down to the second, and no specialized equipment beyond a jar and something to strain with. This guide covers every variable from grind selection and ratio to steeping vessels and filtration methods, with specific guidance for getting excellent results from the ground coffee that’s already in your pantry.
How Cold Brew Coffee Extraction Works
The Cold Extraction Principle
Cold brew coffee relies on time rather than heat to dissolve flavor compounds from coffee grounds into water. At brewing temperatures of 195°F to 205°F, hot water extracts flavor compounds from coffee in 4 to 8 minutes. At refrigerator temperature of 38°F to 40°F, the same extraction takes 12 to 24 hours because cold water dissolves compounds more slowly and less aggressively than hot water.
This slow, cold extraction is what produces cold brew’s characteristic flavor profile: smooth, low-acid, and full-bodied with minimal bitterness. The acidic compounds and bitter phenols that hot water extracts aggressively during a short brew cycle remain partially undissolved in a cold steep, leaving behind a liquid that’s sweeter, rounder, and significantly easier on the stomach than equivalent hot-brewed coffee.
The extraction is also selective by temperature. Chlorogenic acids that break down during hot brewing and contribute to coffee’s perceived bitterness don’t degrade during cold extraction, but they also extract more slowly than the desirable flavor compounds. With the correct ratio and steep time, you extract sweetness, body, and roasted depth while leaving a disproportionate amount of harsh acids behind.
Why Grind Size Controls Everything in Cold Brew
Grind size determines surface area, which directly controls how fast flavor compounds dissolve from the grounds into cold water. A fine grind has dramatically more surface area than a coarse grind of the same weight, which means fine grounds extract the same total quantity of flavor compounds faster even in cold water.
During a 16-hour refrigerator steep, fine or medium-fine grounds have enough total contact time to over-extract, pulling bitter and astringent compounds that a coarser grind would leave behind. The over-extraction from fine grounds produces a concentrate that tastes harsh and bitter regardless of how much you dilute it, because the problem is in the chemical composition of what was extracted, not just the concentration.
A coarse grind’s reduced surface area slows the extraction rate to match the long cold steep window. This gives you a 4 to 6 hour flexibility window around your target steep time without significant quality degradation. If you use a coarse grind and steep for 18 hours instead of your target 16, the result is marginally stronger but not bitter. The same 2-hour overshoot with fine grounds produces a noticeably harsher cup.
The Concentrate Model and Dilution Logic
Most cold brew recipes produce a concentrate rather than a ready-to-drink beverage. The standard 1:5 coffee-to-water ratio by weight produces a concentrated output designed to be diluted 1:1 with cold water or milk before serving. This concentrate model is practical because it stores efficiently, occupies less refrigerator space, and allows you to customize each serving’s strength at the time of serving.
The concentrate is typically 2 to 2.5 times stronger than what you’d want to drink straight and has a thick, syrupy quality from its high dissolved solids content. Some first-time cold brew makers taste the concentrate before diluting and conclude that their batch failed because it’s too strong. This is expected behavior from a correctly made concentrate.
If you prefer a ready-to-drink format without the dilution step, use a 1:8 coffee-to-water ratio instead. This produces a thinner, lighter output that can be poured directly over ice without additional dilution. The tradeoff is that ready-to-drink cold brew has a shorter flavor peak period than concentrate since its lower dissolved solids content degrades more noticeably over the two-week storage window.
Ground Coffee Selection for Cold Brew
Pre-Ground Coffee Options and Their Limitations
Pre-ground coffee sold for standard drip machines uses a medium to medium-fine grind calibrated for 4 to 6 minute hot extraction. Using this grind directly in cold brew at a 16 to 24-hour steep produces significant over-extraction, particularly in the later hours of the steep when the concentration gradient between the grounds and the surrounding liquid is low and bitter compounds continue dissolving.
If standard drip pre-ground is your only option, reduce the steep time to 10 to 12 hours and use the recipe’s minimum water temperature (room temperature rather than refrigerator cold) to limit the additional extraction that cold water provides. Room temperature steeping with a medium-fine grind at 10 hours produces a more balanced result than refrigerator steeping at the full 16 to 24-hour window.
Pre-ground coffee specifically labeled for French press, cold brew, or coarse grind is the better starting point. This grind is calibrated for longer extraction contact times and produces properly balanced cold brew at standard 12 to 24-hour refrigerator steep windows. Starbucks Cold Brew Blend, Chameleon Organic Cold-Brew Coffee, and Stone Street Cold Brew Coffee all sell pre-ground coffee specifically at the coarse grind level appropriate for cold brew.
Roast Level and Flavor Impact
Medium and dark roast coffees produce the best cold brew results because their flavor profiles include the heavy, caramelized, chocolatey notes that cold extraction emphasizes most favorably. The roasting process creates melanoidins and caramelized sugars that are among the most water-soluble compounds in coffee and extract readily even in cold water, giving medium and dark roast cold brews their characteristic sweetness and body.
Dark roast cold brew produces an intensely rich, heavy-bodied concentrate with deep chocolate and roasted notes that holds up extremely well to milk dilution. It’s the preferred choice for cold brew lattes and any serving style that involves dairy or non-dairy milk additions. Dark roast pre-ground coffee from brands including Peet’s Major Dickason’s Blend, Lavazza Super Crema, and Death Wish Coffee all perform well in cold brew applications.
Medium roast cold brew produces a more balanced concentrate with a wider range of flavor notes including mild fruit, nuts, and caramel alongside the heavier chocolate and roasted base. It’s more versatile across serving styles and works equally well as a straight black iced coffee, diluted with water, or combined with milk.
Light roast cold brew is usable but more technically demanding. Light roasts have higher chlorogenic acid content and extract differently in cold water than darker roasts, sometimes producing a sour, fruity, or thin result if the ratio or steep time isn’t precisely calibrated. They’re best left for experienced cold brew makers who want to experiment rather than beginners seeking consistent results.
Brewing Vessels: Types and Comparisons
Mason Jar Method
The wide-mouth glass mason jar is the most accessible cold brew vessel because most households already have them and they require no additional investment. Ball wide-mouth mason jars in 32 oz (quart) or 64 oz (half-gallon) sizes accommodate a single or double standard batch comfortably.
The 32 oz jar at a 1:5 ratio holds approximately 175g of ground coffee and 875 ml of water, producing roughly 700 ml to 800 ml of finished concentrate after accounting for grounds absorption. The 64 oz jar at the same ratio doubles the output for households that use cold brew daily.
The mason jar method requires a separate filtration step after steeping since the jar has no built-in filter. Pouring through a fine-mesh strainer lined with cheesecloth or a paper filter into a second container takes 5 to 15 minutes depending on how fine the grounds are and which filtration method you use.
Dedicated Cold Brew Pitchers
Dedicated cold brew pitchers include built-in filtration systems that eliminate the separate straining step. The Hario Mizudashi Cold Brew Pot (available in 600 ml and 1,000 ml sizes) uses a removable mesh basket that holds the grounds during steeping and lifts out cleanly when steeping is complete.
The OXO Good Grips Cold Brew Coffee Maker (32 oz / 946 ml capacity) uses a perforated bottom filter screen and a release valve that drips the finished concentrate into a separate glass carafe. Its rainmaker lid distributes water evenly over the grounds during filling, which the OXO calls its primary design advantage over competing pitchers.
For maximum filtration quality and sediment removal, the Toddy Cold Brew System uses a thick reusable felt filter pad that removes coffee oils and ultrafine particles that mesh filter systems allow through. The resulting concentrate is noticeably smoother and cleaner than mason jar or mesh-filtered output, with measurably lower acidity. The tradeoff is more setup time (wetting the felt filter, seating the rubber stopper) and the need to replace filter pads every 10 to 15 uses.
French Press as a Cold Brew Vessel
A French press doubles effectively as a cold brew vessel. The grounds steep directly in the carafe, and the plunger screen separates them from the liquid when you press at the end of the steep period. Most French press carafes hold 34 oz (1,000 ml), which is a convenient cold brew batch size.
The limitation of a French press for cold brew is that the plunger mesh screen is coarser than a dedicated cold brew filter and allows more micro-fines and coffee oils through than mesh filter pitchers. The result is a heavier-bodied concentrate with slightly more sediment. For users who want the richest, heaviest-bodied cold brew, this is actually preferable. For users who prefer a cleaner cup, a paper filter pass of the pressed concentrate solves the sediment problem.
Vessel Comparison at a Glance
| Vessel | Capacity | Built-in Filter | Filtration Quality | Ease of Use | Best For |
|---|---|---|---|---|---|
| Mason jar (32 oz) | 32 oz | None | Variable (depends on straining method) | Simple | Budget setup, flexible batch size |
| Hario Mizudashi | 600 ml or 1,000 ml | Mesh basket | Medium | Very easy | Daily home use |
| OXO Good Grips | 32 oz (946 ml) | Perforated screen + carafe | Medium-high | Easy, mess-free | Clean output, countertop use |
| Toddy Cold Brew System | 56 oz water capacity | Reusable felt pad | Very high | Moderate setup | Smoothest, lowest-acid concentrate |
| French press (34 oz) | 34 oz | Plunger mesh | Low to medium | Easy | Rich, heavy-bodied output |
Step-by-Step: How to Make Cold Brew Coffee With Ground Coffee
Step 1: Select and Measure Your Ground Coffee
Identify the grind coarseness of your ground coffee before committing to a steep time and ratio. If the grounds are labeled for drip use, they’re medium to medium-fine and require a shorter steep time (10 to 12 hours) than true coarse grind cold brew coffee. If the grounds are labeled for French press, cold brew, or coarse grind, use the standard 12 to 24-hour window.
Weigh your coffee on a kitchen scale accurate to 1g rather than measuring by volume. Coffee grounds vary significantly in density by grind coarseness and roast level, so a tablespoon of fine-ground dark roast weighs more than a tablespoon of coarse-ground light roast. For a standard 1-liter batch at 1:5 ratio, you need 175g to 200g of ground coffee.
Step 2: Prepare Your Brewing Vessel
If using a mason jar, rinse it with cold water and verify it’s free of soap residue or odors from previous storage. Soap residue in a mason jar used for cold brew produces a faint detergent taste in the finished concentrate that’s particularly noticeable in the first cold brew you make in a newly used jar.
For the Hario Mizudashi, insert the mesh basket into the pitcher body before adding any ingredients. For the OXO Good Grips, set the brewing container on the glass carafe with the release valve in the closed position before adding water and grounds. For the Toddy system, wet the felt filter under cold water for 30 seconds, seat it in the drain hole, then push the rubber stopper firmly into the bottom drain from the outside before adding any water.
Step 3: Add Ground Coffee to the Vessel
For a mason jar: add the measured ground coffee directly to the jar. For a Hario Mizudashi: fill the mesh basket with grounds, then insert the filled basket into the pitcher. For an OXO: add grounds to the brewing container before attaching the rainmaker lid. For a Toddy: add grounds and water in alternating layers (half the water, all the grounds, remaining water) to ensure even saturation from the start.
Don’t compress or tamp the grounds in any vessel. Compacted grounds restrict water flow through the coffee bed and create channels where water passes through preferentially, producing uneven extraction across the batch.
Step 4: Add Cold Filtered Water
Pour cold filtered water over the grounds slowly and evenly. For a mason jar, pour in a circular pattern and stir once immediately after the full water volume is added to saturate all grounds that floated to the surface or stuck to the jar walls. Dry grounds that remain unsaturated throughout the steep don’t extract and effectively reduce your coffee dose.
For the OXO: pour water through the rainmaker lid holes, which distribute it evenly across the entire ground surface automatically. For the Hario Mizudashi: pour water around the inserted mesh basket so it seeps through the mesh and wets the grounds from all sides. Fill to the appropriate mark for your desired batch size.
Step 5: Initial Stir and Rest
For vessels where you poured water directly over the grounds (mason jar, Toddy), stir gently with a long spoon for 20 to 30 seconds to ensure every gram of grounds has made contact with water. Look for dry clumps at the bottom or sides of the vessel and break them up with the spoon tip.
After stirring, let the vessel sit at room temperature for 5 minutes before moving it to the refrigerator. This brief room-temperature rest allows the grounds to absorb the initial water and reduces the gas bubble turbulence that freshly ground coffee produces when first wetted, which can cause the grounds to float in a loose mass rather than settling into an evenly saturated bed.
Step 6: Cover and Steep in the Refrigerator
Cover the vessel with its lid, a piece of plastic wrap secured with a rubber band, or its fitted cover, and place it in the refrigerator on a flat, stable shelf. Steep for the following times based on your grind coarseness:
Use 10 to 12 hours for medium-fine (standard drip) pre-ground coffee. Use 12 to 16 hours for medium-coarse ground coffee. Use 16 to 24 hours for coarse-ground coffee (true cold brew or French press grind). The sweet spot for most medium-to-dark roast coffees at a coarse grind is 16 to 18 hours, which produces a balanced, full-bodied concentrate with good sweetness and no over-extraction bitterness.
Step 7: Filter the Concentrate
After steeping, remove the vessel from the refrigerator and allow it to sit at room temperature for 5 to 10 minutes. Cold filtration is slower than room-temperature filtration because cold liquid is more viscous, and warming slightly speeds the straining process.
For a mason jar: set a fine-mesh strainer over a clean bowl or pitcher and line it with a single layer of cheesecloth, a nut milk bag, or a paper coffee filter. Pour the cold brew slurry through the lined strainer in a slow, continuous pour. For a paper filter pass, expect 5 to 15 minutes of draining time. Do not squeeze or press the grounds against the filter since this forces bitter oils through the filter material.
For a Hario Mizudashi: lift the mesh basket straight out of the pitcher, hold it above the pitcher for 30 to 60 seconds to allow dripping to finish, then discard the grounds. For an OXO: place the brewing container over the glass carafe and flip the release valve to the open position. For a Toddy: set the brewing container over the glass decanter and pull the rubber stopper from the bottom to initiate gravity drainage through the felt pad.
Step 8: Store and Serve
Transfer the filtered concentrate to a clean, airtight glass container if it isn’t already in one. The Toddy glass decanter with its fitted lid is ideal for both storage and serving. 32 oz glass mason jars with tight-fitting lids are equally effective. Glass is preferred over plastic for storage since it doesn’t absorb coffee odors or flavors over the two-week storage window.
Label the storage container with the brew date. Concentrate held for more than two weeks loses the flavor complexity and sweetness of a fresh batch and begins tasting flat. To serve, combine 1 part concentrate with 1 part cold water or milk in a glass filled with ice. Adjust the ratio to taste: a 1:1.5 ratio produces a gentler, lighter drink while 2:1 concentrate to water produces an intensely coffee-forward serving.
Common Mistakes That Ruin Cold Brew
Using the Wrong Grind for the Steep Time
The most common cold brew failure is combining medium-fine pre-ground drip coffee with a 16 to 24-hour refrigerator steep. This produces a concentrate that tastes harsh, bitter, and astringent because the fine-ground coffee has massively over-extracted during the extended contact time. Many first-time cold brewers conclude that cold brew is difficult or that their beans are bad, when the actual problem is a grind-to-time mismatch.
The fix is either to use coarser grounds for the full steep window or to shorten the steep time to 10 to 12 hours when using standard drip-ground coffee. Both approaches work. The coarser grind approach produces a better-quality concentrate with more complexity; the shortened steep approach is the practical solution when coarser grounds aren’t available.
Not Saturating All the Grounds
Pouring water into a mason jar of grounds without stirring leaves a significant portion of grounds unsaturated at the top of the jar. These dry grounds don’t extract during the steep, which means your actual extraction ratio is lower than your measured ratio, producing a weaker-than-expected concentrate.
Always stir after adding water to a mason jar or any vessel where the water is poured directly over the grounds rather than through a distribution system. The stir takes 20 seconds and ensures that every gram of ground coffee contributes to the extraction.
Filtering Too Aggressively
Pressing the saturated grounds against a cheesecloth or squeezing the grounds bag to speed up filtration forces bitter, astringent compounds through the filter material that gravity filtration would have left behind. The last 10% of liquid in a cold brew batch contains the most concentrated bitter compounds, and forcing them through the filter contaminates the entire batch.
Use only gravity filtration. Allow the liquid to drip through the filter naturally regardless of how slowly it proceeds. Set up the filtration before going to bed and collect the finished concentrate in the morning if patience is an issue during the day.
Pro Tips for Better Cold Brew With Ground Coffee
Use Bloom Pre-Saturation for Fresh Coffee
For freshly ground coffee or coffee roasted within the past two weeks, try a pre-saturation step before the main cold water addition. Pour 2 to 3 tablespoons of room-temperature water over the grounds in the vessel and let it sit for 45 seconds. This brief bloom releases trapped CO2 from fresh coffee that would otherwise create buoyancy that keeps grounds floating on the water surface rather than settling into an evenly saturated bed.
The bloom step is most noticeable with freshly roasted, freshly ground coffee where off-gassing is most active. With older coffee, the difference is minimal, but the step costs nothing and takes under a minute.
Try a Partial Room-Temperature Steep
Steeping cold brew at room temperature for the first 4 to 6 hours before transferring to the refrigerator for the remainder of the steep window produces a slightly different flavor profile than a fully refrigerator-steeped batch. The initial room-temperature phase extracts the bright aromatic compounds more efficiently before the cold phase captures the heavier body and sweet base notes.
This approach produces a more complex concentrate with both aromatic brightness and cold-brew smoothness. It works best with medium roast coffees where the range of flavor compounds is widest and benefits most from the temperature variation. Use it as an experiment after you’ve established your baseline refrigerator steep results.
Make Coffee Ice Cubes From the Concentrate
The most practical daily use upgrade for regular cold brew drinkers is freezing leftover concentrate in a standard ice cube tray and using the resulting coffee cubes instead of water ice. As the coffee cubes melt, they intensify the drink rather than diluting it, keeping every sip as strong as the first.
Pour concentrate into the tray immediately after filtering while it’s still cold for the fastest freezing. Freeze for at least 4 to 6 hours before transferring to a sealed freezer bag for long-term storage. Coffee ice cubes keep for up to 3 months in a sealed freezer bag and are available for immediate use in any iced coffee serving style.
Adjust Ratio for Your Bean Age
Ground coffee older than 6 weeks has lost a significant portion of its aromatic volatile compounds through oxidation and off-gassing. These older grounds extract less efficiently in cold water and often produce thin, flat cold brew at standard ratios. Increase the dose by 15% to 20% (from 175g to 200g or 210g per liter) and extend the steep time to the upper end of the recommended window when working with older ground coffee.
This dose and time adjustment compensates for reduced extraction potential and produces a concentrate comparable in quality to a standard-ratio batch made with fresher coffee. It won’t fully replicate the complexity of fresh-ground coffee, but it’s a significant practical improvement over using an unchanged recipe with aged grounds.
Maintenance and Cleaning for Cold Brew Equipment
After Every Batch
Discard spent grounds immediately after filtering. Wet grounds left in any vessel for more than 24 hours develop mold, particularly in mesh basket components where the dense, moisture-retaining grounds create an ideal environment for microbial growth. Rinse the vessel, basket, and any filtration components under warm running water immediately after discarding grounds.
For the Hario Mizudashi mesh basket and OXO stainless screen, rinse under warm running water and use a soft bottle brush to clear any grounds from the mesh openings. The mesh is fine enough that grounds compact into it if not cleared promptly, eventually restricting flow and requiring more aggressive cleaning to restore.
Weekly Deep Clean
Wash all cold brew components with warm soapy water and a bottle brush once a week if you’re brewing multiple batches. Pay particular attention to the bottom interior corners of mason jars and pitchers where fine sediment accumulates over multiple batches and develops a rancid odor if left uncleaned.
For the Toddy felt filter pad, rinse under cold running water only after each use. Never use soap or detergent on the felt pad since the absorbent fibers permanently trap cleaning agents. Gently squeeze the wet pad rather than wringing it, and either air dry completely before storage or refrigerate in a small sealed bag of cold water between same-week batches.
Storage Between Batches
Store clean, dry cold brew vessels with their lids off or loosely placed to allow any residual moisture to evaporate. Sealing a damp vessel for storage traps moisture that promotes mold growth between uses, particularly in warm kitchens.
Glass mason jars can be stored clean in a cupboard between uses. The Hario Mizudashi should be stored with the mesh basket out of the pitcher body so both dry completely independently. The Toddy brewing container should be stored with the rubber stopper removed to allow the drain area to dry thoroughly.
Frequently Asked Questions
Can I use pre-ground coffee for cold brew?
Yes, pre-ground coffee works for cold brew with one important adjustment. Most pre-ground coffee sold for drip machines uses a medium-fine grind calibrated for hot, single-pass brewing. In a cold brew steep of 16 to 24 hours, this grind over-extracts and produces bitter, astringent concentrate. The fix is to use pre-ground coffee labeled for French press or cold brew, which uses a coarser grind, or to reduce your steep time to 10 to 12 hours if you’re using standard drip-grind coffee. Specialty cold brew pre-ground options from brands including Starbucks, Stone Street, and Chameleon use appropriately coarse grinds and work well at standard steep windows.
What ratio of coffee to water is best for cold brew?
The standard cold brew concentrate ratio is 1:5 coffee to water by weight: 1 gram of coffee for every 5 grams of water. For a 1-liter batch, that means approximately 175g to 200g of ground coffee. This produces a concentrated output designed for 1:1 dilution before serving. For ready-to-drink cold brew that doesn’t need dilution, use a 1:8 ratio (approximately 110g to 125g per liter).
Always measure by weight rather than volume since ground coffee density varies significantly by grind coarseness and roast level. A kitchen scale accurate to 1g produces more consistent batches than tablespoon measurements.
How long should I steep cold brew coffee?
Steep time depends primarily on grind coarseness and your target flavor profile. Coarse-ground coffee (French press or cold brew grind) at refrigerator temperature needs 12 to 24 hours, with 16 to 18 hours being the sweet spot for most medium and dark roasts.
Medium-fine pre-ground drip coffee needs only 10 to 12 hours at refrigerator temperature before over-extraction begins.
Room-temperature steeping works in 8 to 12 hours regardless of grind but introduces more variability and fermentation risk past the 12-hour mark in warm kitchens. Write your start time on a piece of tape attached to the vessel so you can track elapsed time accurately.
Why does my cold brew taste bitter?
Cold brew bitterness almost always comes from one of three causes. First, the grind is too fine for the steep time you used. Medium-fine or drip-grind coffee over-extracts in a standard 16 to 24-hour steep.
Shift to a coarser grind or reduce steep time. Second, you pressed or squeezed the grounds during filtration, forcing bitter oils and compounds through the filter that gravity draining would have left behind.
Third, you steeped at room temperature for too long without monitoring, causing fermentation-adjacent reactions that produce off-flavors. Address grind coarseness first since it’s the most common cause and the easiest to fix.
Do I need special equipment to make cold brew with ground coffee?
No. All you need is a wide-mouth glass mason jar, a fine-mesh strainer, cheesecloth or a paper coffee filter, ground coffee, and cold filtered water. The mason jar method produces excellent cold brew when grind size and ratio are correct.
Dedicated cold brew vessels like the Hario Mizudashi, OXO Good Grips, and Toddy system make the process faster and cleaner by eliminating the separate filtration step, but they produce the same quality output when the same grind and ratio are used.
The main practical advantage of dedicated vessels is convenience rather than any fundamental improvement in extraction chemistry.
How do I make cold brew less watery?
Watery cold brew results from using too little coffee relative to the water volume. Verify that your ratio is at least 1:5 (175g to 200g coffee per liter of water) for concentrate. If you’re making ready-to-drink cold brew at a 1:8 ratio and find it too weak, increase to 1:6 and re-evaluate.
Also verify that all your grounds were fully saturated during the steep since unsaturated grounds don’t contribute to extraction, effectively reducing your real dose below your measured dose.
Finally, if using medium-fine pre-ground with a shortened steep time of 10 to 12 hours, the shorter steep produces a lighter concentrate than a full 16 to 18-hour coarse-grind steep at equivalent ratios.
Can I leave cold brew steeping for more than 24 hours?
Extending cold brew past 24 hours in the refrigerator produces a noticeably more bitter, astringent concentrate for most coffee types and grind sizes. The desirable flavor compounds reach near-saturation in the liquid within 18 to 20 hours, while bitter compounds continue extracting slowly throughout any additional time.
Going to 28 or 30 hours produces a concentrate that’s over-extracted at any dilution ratio. If you can’t filter your batch at the target time, moving the vessel to the coldest part of your refrigerator (closer to the back where temperatures approach 34°F to 36°F) slows the extraction enough to buy an additional 2 to 3 hours without significant quality degradation.
How do I store cold brew concentrate and how long does it last?
Store cold brew concentrate in a sealed glass container in the refrigerator at 38°F to 40°F. An airtight glass mason jar, the Toddy glass decanter, or any glass carafe with a rubber-gasketed lid works well.
The concentrate stays fresh for up to two weeks from the brew date. After two weeks, the flavor becomes noticeably flat and loses the sweetness and complexity of a fresh batch.
Label every container with the brew date so you know exactly how old each batch is. Ready-to-drink cold brew (already diluted) should be consumed within 4 to 5 days since its lower dissolved solids content makes it less stable than full concentrate.
Is cold brew the same as iced coffee?
No, cold brew and iced coffee are entirely different beverages despite both being served cold. Iced coffee is hot-brewed coffee poured over ice, which retains the bright, acidic flavor profile of hot extraction. Cold brew is brewed exclusively with cold water over an extended steep period, producing a fundamentally different flavor profile with lower acidity, less bitterness, and significantly more sweetness and body than hot-brewed coffee at equivalent strength. Cold brew also has approximately twice the caffeine per fluid ounce as standard hot-brewed coffee since the concentrate ratio is higher than hot brew’s standard ratio. Diluting 1:1 before serving brings the caffeine content roughly in line with regular drip coffee per serving.
Conclusion
Making excellent cold brew coffee with ground coffee comes down to three fundamentals that, when aligned correctly, produce a smooth, rich concentrate that outperforms most store-bought cold brew on flavor and freshness: coarse grind matched to a 12 to 18-hour refrigerator steep, a 1:5 concentrate ratio measured by weight, and gravity filtration that doesn’t force bitter compounds through the filter.
The equipment investment is optional rather than necessary. A 32 oz wide-mouth mason jar and a fine-mesh strainer produce results identical to a dedicated cold brew pitcher when grind and ratio are correct. If convenience and cleanup speed matter more than saving equipment cost, the Hario Mizudashi at the 1,000 ml size is the most practical everyday upgrade for home cold brew brewing, and the Toddy Cold Brew System delivers the smoothest, cleanest concentrate when quality is the primary priority.
Anyone learning how to make cold brew coffee with ground coffee for the first time should start with whatever coarse pre-ground coffee is available, a mason jar, the 1:5 ratio, and a 14 to 16-hour refrigerator steep. Make one batch, taste the concentrate before diluting, and adjust grind coarseness or steep time based on that honest assessment. Most people reach a genuinely satisfying result within two batches, and from that calibrated baseline, every refinement adds complexity rather than correcting a fundamental problem.